Old-Fashioned Fudge Icing: A Rich, Nostalgic Chocolate Classic
Old-Fashioned Fudge Icing: A Rich, Nostalgic Chocolate Classic
Introduction
There’s something incredibly comforting about recipes that feel like they’ve been passed down through generations—written on worn recipe cards, remembered by heart, and made without a second thought. Old-fashioned fudge icing is one of those treasures. It brings to mind cozy kitchens, the hum of a mixer, and the anticipation of that first rich, chocolatey bite spread over a warm cake.
This isn’t the kind of icing you rush through. It asks for your attention, your patience, and just a little bit of trust in the process. But in return, it gives you something truly special: a silky, deeply chocolate frosting that sets just right and tastes like pure nostalgia. If you’ve ever had a slice of homemade cake topped with fudge icing that melts slightly into every crumb, you already know the magic.
What makes this recipe so memorable is its simplicity. No complicated ingredients, no shortcuts—just classic pantry staples transformed into something irresistible. Whether you’re baking for a family gathering, a celebration, or simply to recreate a sweet memory, this old-fashioned fudge icing delivers every time. And once you make it from scratch, it’s hard to go back to anything else.
Old-Fashioned Fudge Icing
Ingredients
First, gather all of the ingredients:
2 cups sugar
1/2 cup milk
1/2 cup butter (stick)
1/2 cup cocoa
1/4 tsp salt
1 tsp. vanilla extract (my kits make the best vanilla extract!)
Directions
Then, carefully follow the instructions:
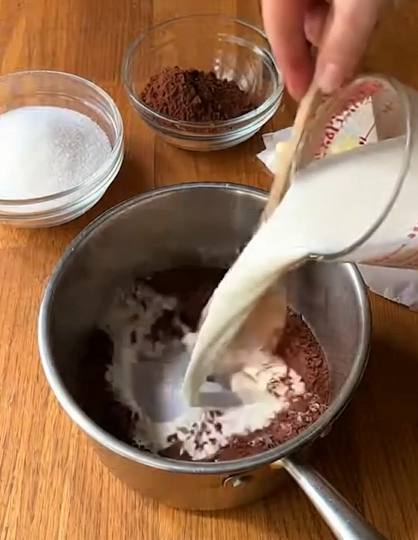
Cooking the fudge:
In a medium, heavy pot mix the sugar, cocoa, and salt with a wooden spoon.
Gradually stir in milk.
Add the butter.
Bring to a full rapid boil that can’t be stirred down.
Boil exactly 3 minutes, 45 seconds, stirring constantly.
Add the vanilla extract (add last because the flavor of vanilla is diminished the longer it cooks).
Then cool no more than 5 minutes.
Beating the fudge:
Remove the pan from the heat and either with a hand-held mixer or a stand mixer with a whisk attachment, beat the fudge.
Beat (start on low then move to high) exactly 5-10 minutes minutes till creamy.
As you beat, the icing will gradually lose some of its shininess and thicken on the beaters and the spatula.
How do you know when it’s ready? Watch the way the icing behaves along the edge of the bowl. When it starts to stiffen along the edges, and the texture of the icing is creamy and dull rather than shiny, it’s done.
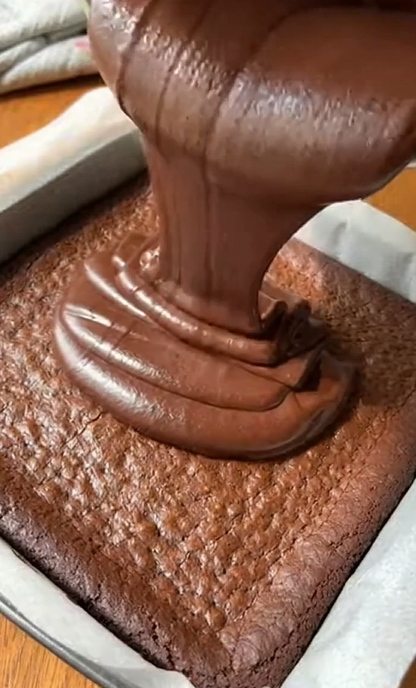
Pour and spread the icing immediately on your cake or brownies.
Tips for Perfect Fudge Icing
This recipe is beautifully simple, but a few small tips can make a big difference in your results. First, use a heavy-bottomed pot. This helps distribute heat evenly and prevents scorching, which can affect both texture and flavor. Stirring constantly during the boiling stage is essential—this keeps everything smooth and prevents sticking.
Timing is everything here. That exact boil time matters because it determines the final consistency. Too short, and the icing may not set properly. Too long, and it can become too thick or crumbly. If you’re unsure, it’s worth using a timer for precision.
When beating the icing, don’t rush it. The transformation from glossy to creamy is your visual cue that everything is coming together just right. It’s a small detail, but it’s what gives this icing its signature texture.
Substitutions and Variations
If you want to adapt this recipe slightly, there are a few easy ways to do it without losing its classic charm. You can swap regular milk with evaporated milk for a slightly richer flavor. For a deeper chocolate taste, try using a high-quality cocoa powder.
If you’re looking for a hint of something extra, a small pinch of espresso powder can enhance the chocolate flavor without making it taste like coffee. You can also experiment with adding chopped nuts for texture once the icing is ready.
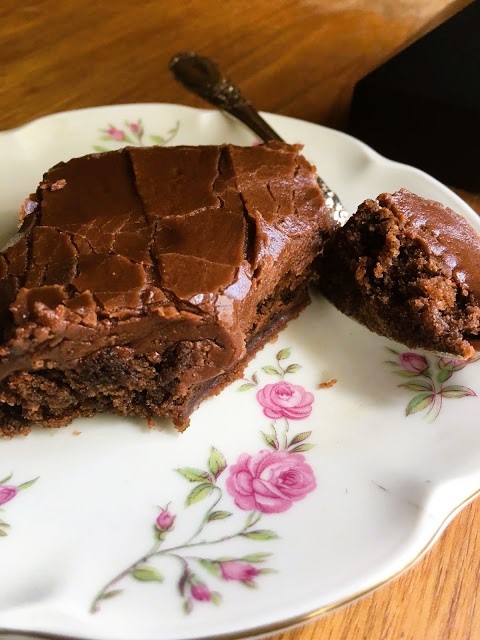
Serving Ideas
This old-fashioned fudge icing pairs beautifully with simple, homemade cakes. Think classic yellow cake, moist chocolate cake, or even a pan of warm brownies. It spreads best while still warm, creating a smooth, slightly glossy finish that sets into a soft, fudge-like layer.
It’s perfect for birthdays, family gatherings, or even just a quiet afternoon treat with a cup of coffee or tea. There’s something about this icing that makes any dessert feel just a little more special.
Storage Tips
Because this icing sets as it cools, it’s best used immediately after preparation. If you do have leftovers, store them in an airtight container at room temperature for up to a day. To reuse, gently warm it and stir until it softens enough to spread again.
If the icing has already set on a cake or brownies, simply cover and keep at room temperature for up to two days. Avoid refrigeration if possible, as it can firm up the texture too much.
FAQ
1. Why did my fudge icing turn grainy?
Graininess usually happens if the sugar didn’t dissolve completely or if the mixture was overcooked. Stirring constantly and following the timing closely helps prevent this.
2. Can I make this icing ahead of time?
This icing is best made fresh because it thickens quickly as it cools. If needed, you can reheat it gently, but the texture is best right after preparation.
3. What cakes work best with this icing?
It pairs wonderfully with yellow cake, chocolate cake, or brownies. Its rich flavor complements simple bases beautifully.
4. Can I use a hand whisk instead of a mixer?
You can, but it will take more effort and time. A mixer makes it much easier to achieve the smooth, creamy texture.