Butterfinger Reese’s Fudge: The Ultimate No-Bake Candy Lover’s Treat
Butterfinger Reese’s Fudge: The Ultimate No-Bake Candy Lover’s Treat
Introduction
Some desserts feel like they were created for special occasions, while others seem designed purely to bring joy. This Butterfinger Reese’s Fudge definitely belongs in the second category. Rich, creamy, colorful, and packed with favorite candy flavors, it’s the kind of sweet treat that disappears from the dessert table long before anyone asks for seconds.
Growing up, homemade fudge was always one of those desserts that signaled something special. Whether it appeared during holiday gatherings, birthday celebrations, movie nights, or family potlucks, there was something exciting about seeing a tray of perfectly cut fudge squares waiting to be enjoyed. The best part was always discovering creative variations that transformed traditional fudge into something completely unique.
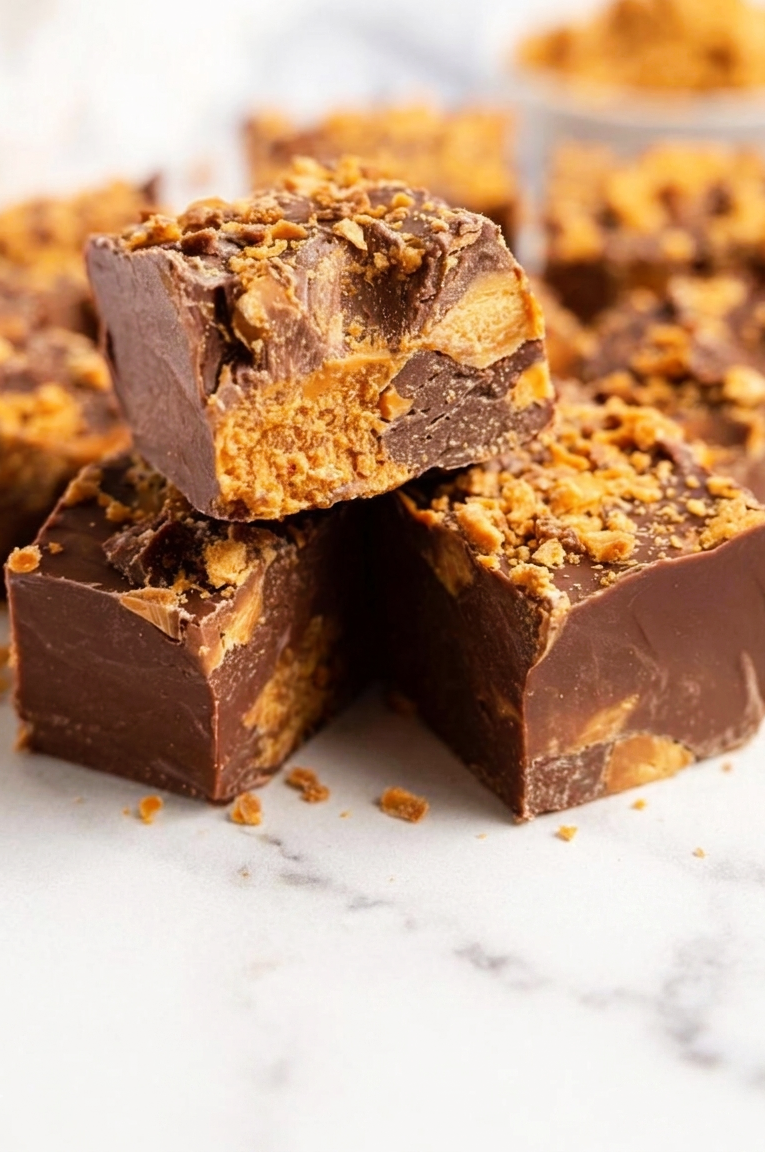
This recipe combines smooth white chocolate fudge with the irresistible crunch of Butterfinger candy bars and the peanut buttery goodness of Reese’s candies. Every bite delivers a combination of creamy, crunchy, sweet, and chocolatey flavors that make it nearly impossible to stop at just one square. Fortunately, these little pieces are rich enough that a small serving goes a long way, though human self-control around candy-loaded fudge remains one of science’s unsolved mysteries.
Whether you’re preparing treats for the holidays, creating a dessert platter for a gathering, or simply satisfying a serious sweet tooth, this easy no-bake recipe is guaranteed to become a favorite. Best of all, it requires minimal effort while delivering bakery-worthy results.
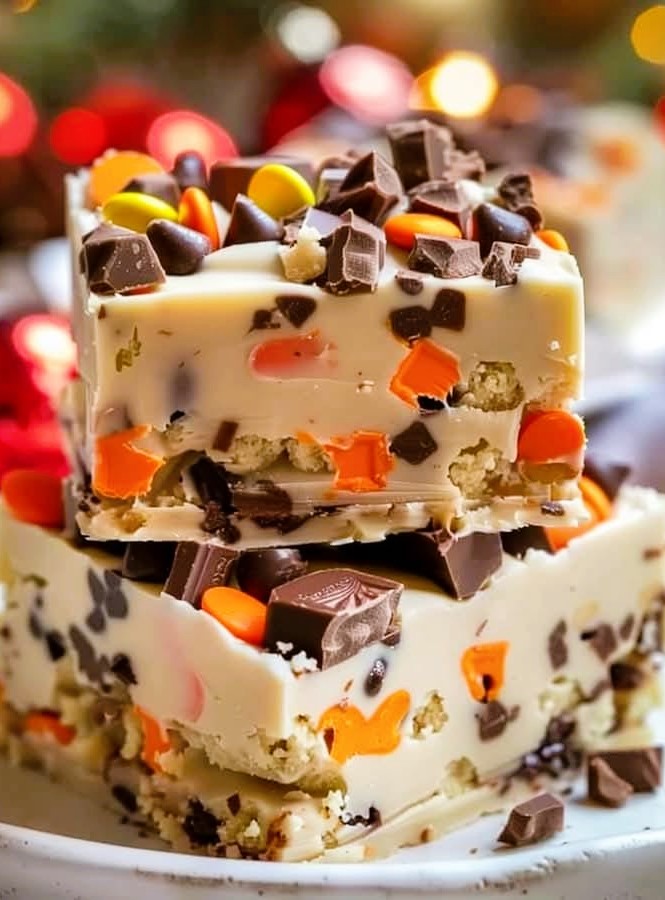
Butterfinger Reese’s Fudge
Ingredients:
3 cups white chocolate chips
1 (14 oz) can sweetened condensed milk
1 teaspoon vanilla extract
1 cup crushed Butterfinger candy bars
1 cup mini Reese’s Pieces candy
1/2 cup mini chocolate chips
1/2 cup chopped Reese’s cups
Directions:
Prepare the Pan: Line an 8×8-inch baking dish with parchment paper, leaving some overhang for easy removal.
Melt the Base: In a medium saucepan over low heat, combine the white chocolate chips and sweetened condensed milk. Stir constantly until the chocolate is completely melted and smooth. Remove from heat and stir in the vanilla extract.
Mix in Candy: Quickly fold in the crushed Butterfinger candy bars and half of the Reese’s Pieces. Mix until evenly combined.
Spread and Decorate: Pour the fudge mixture into the prepared pan and spread evenly. Top with the remaining Reese’s Pieces, mini chocolate chips, and chopped Reese’s cups, pressing them gently into the fudge.
Chill: Refrigerate the fudge for 2–3 hours, or until set.
Slice and Serve: Once firm, lift the fudge out of the pan using the parchment paper overhang. Cut into squares and serve.
Prep Time: 15 minutes | Chill Time: 2–3 hours | Total Time: 2 hours 15 minutes
Kcal: 210 per piece | Servings: 16 squares
Helpful Tips for Perfect Fudge
Even though this recipe is wonderfully simple, a few helpful tips can ensure perfect results every time.
- Use low heat when melting the white chocolate chips. White chocolate can scorch quickly if the heat is too high.
- Stir continuously while melting the mixture to create a smooth, creamy texture.
- Crush the Butterfinger bars into small pieces, but don’t pulverize them completely. The crunchy texture adds wonderful contrast to the creamy fudge.
- Work quickly once the candy is added. The mixture will begin to thicken as it cools.
- For clean slices, chill the fudge completely and use a sharp knife wiped clean between cuts.
Possible Substitutions
One of the reasons this recipe is so popular is its flexibility.
- Swap white chocolate chips for vanilla-flavored melting wafers for an even smoother texture.
- Use chopped peanut butter cups instead of mini Reese’s Pieces if that’s what you have available.
- Add chopped peanuts for extra crunch and a salty contrast.
- Replace Butterfinger bars with another crunchy candy bar for a different flavor profile.
- Drizzle melted milk chocolate over the top before chilling for an extra decorative finish.
The beauty of homemade fudge is that it welcomes creativity. Many home bakers enjoy customizing it based on favorite candies or seasonal ingredients.
Serving Ideas
This Butterfinger Reese’s Fudge fits almost any occasion.
Serve it as part of a holiday dessert tray alongside cookies, brownies, and truffles. It’s also perfect for birthday parties, game-day gatherings, bake sales, and family celebrations.
For an extra-special dessert presentation, arrange the fudge squares on a decorative platter and sprinkle a few extra crushed candy pieces around the edges. The colorful topping instantly creates a festive appearance.
It also makes a thoughtful homemade gift. Simply place the squares in a decorative tin or gift box lined with parchment paper. Few gifts are appreciated more than homemade candy, especially when it contains two beloved candy classics in one bite.
Storage and Freezing Tips
Proper storage helps maintain the best texture and flavor.
Refrigerator Storage
Store the fudge in an airtight container in the refrigerator for up to one week. Separate layers with parchment paper to prevent sticking.
Freezing Instructions
This fudge freezes surprisingly well.
- Wrap individual pieces or layers tightly in plastic wrap.
- Place them in a freezer-safe container or freezer bag.
- Freeze for up to three months.
When ready to enjoy, transfer the fudge to the refrigerator and allow it to thaw overnight. The texture remains wonderfully creamy even after freezing.
Frequently Asked Questions
Why is my fudge too soft?
Soft fudge is usually caused by insufficient chilling time. Allow the fudge to chill for the full recommended time or longer if needed.
Can I make this recipe ahead of time?
Absolutely. In fact, many people prefer making it a day ahead since the flavors have additional time to develop and the texture becomes even firmer.
Can I use milk chocolate instead of white chocolate?
Yes. The flavor will be different, but milk chocolate creates a rich and delicious variation that pairs beautifully with the candy mix-ins.
Do I need special equipment?
Not at all. A saucepan, mixing spoon, parchment paper, and an 8×8-inch baking dish are all you need. Sometimes the simplest desserts are the ones that earn the most compliments.