Homemade Cinnamon Rock Candy: A Sparkly Holiday Treat With Old-Fashioned Charm
Homemade Cinnamon Rock Candy: A Sparkly Holiday Treat With Old-Fashioned Charm
There’s something magical about old-school candy recipes. The kind that don’t come from a store shelf but from warm kitchens, handwritten cards, and someone patiently stirring a bubbling saucepan like it’s liquid treasure. Cinnamon Rock Candy is exactly that kind of recipe. It reminds me of winter months when the air smelled like spice, kids pressed their noses to frosty windows, and bowls of red candy sat proudly on grandma’s table like edible jewels. Every year, I would wait for the moment the sugar reached the perfect crack stage, the house filling with that unmistakable cinnamon scent that tickled the nose and warmed the soul. It made the whole season feel alive.
This candy has the perfect blend of sweet heat. It’s bold, nostalgic, festive, and honestly one of the easiest show-stopping treats you can make at home. With just a few basic pantry ingredients and a dash of patience, you get beautiful glittering candy pieces that look like stained glass. Whether you’re making it for Christmas tins, gifting to neighbors, or simply indulging childhood memories, this recipe never disappoints. It’s fun, a little dramatic with the candy thermometer and bubbling syrup, and the end result is absolutely worth the wait.
One thing I love about Cinnamon Rock Candy is how personal it feels. The sweetness brings comfort, the spice brings excitement, and breaking it into shards is oddly satisfying—like cracking ice on a frozen pond. Every piece is unique, just like the memories tied to it. It’s lovely tucked into jars tied with ribbons, perfect as party favors, or simply piled into a bowl where hands sneak pieces throughout the day. There’s joy in the process, joy in the flavor, and joy in carrying a timeless kitchen tradition forward.
Cinnamon Rock Candy Recipe
Ingredients :
1 cup water
3 3/4 cup sugar
1 1/4 cup light corn syrup
1 tsp red food coloring
1 tsp cinnamon oil (2 tsp. if you like it spicy)
1 1/2 cup powdered sugar
1 butter, for greasing the surface
Directions :
1 butter a 15 inch x 10 inch x 1 inch sheet cake pan. Line the pan with parchment paper and butter the parchment paper, making sure the edges of the parchment paper are well buttered to prevent the candy from seeping underneath.
2 in a large deep sauce pan combine water, sugar, corn syrup and food coloring. Mix over medium high heat until sugar starts to dissolve. Attach a candy thermometer to the side of the pan making sure it does not touch the bottom of pan for an accurate temperature. Continue to boil until sugar mixture reaches 300°F (hard crack stage) – about 20 minutes. Watch closely, if mixture starts to boil too close to the edge of pan remove pan from heat and stir until bubbles subside and then return to medium high heat.
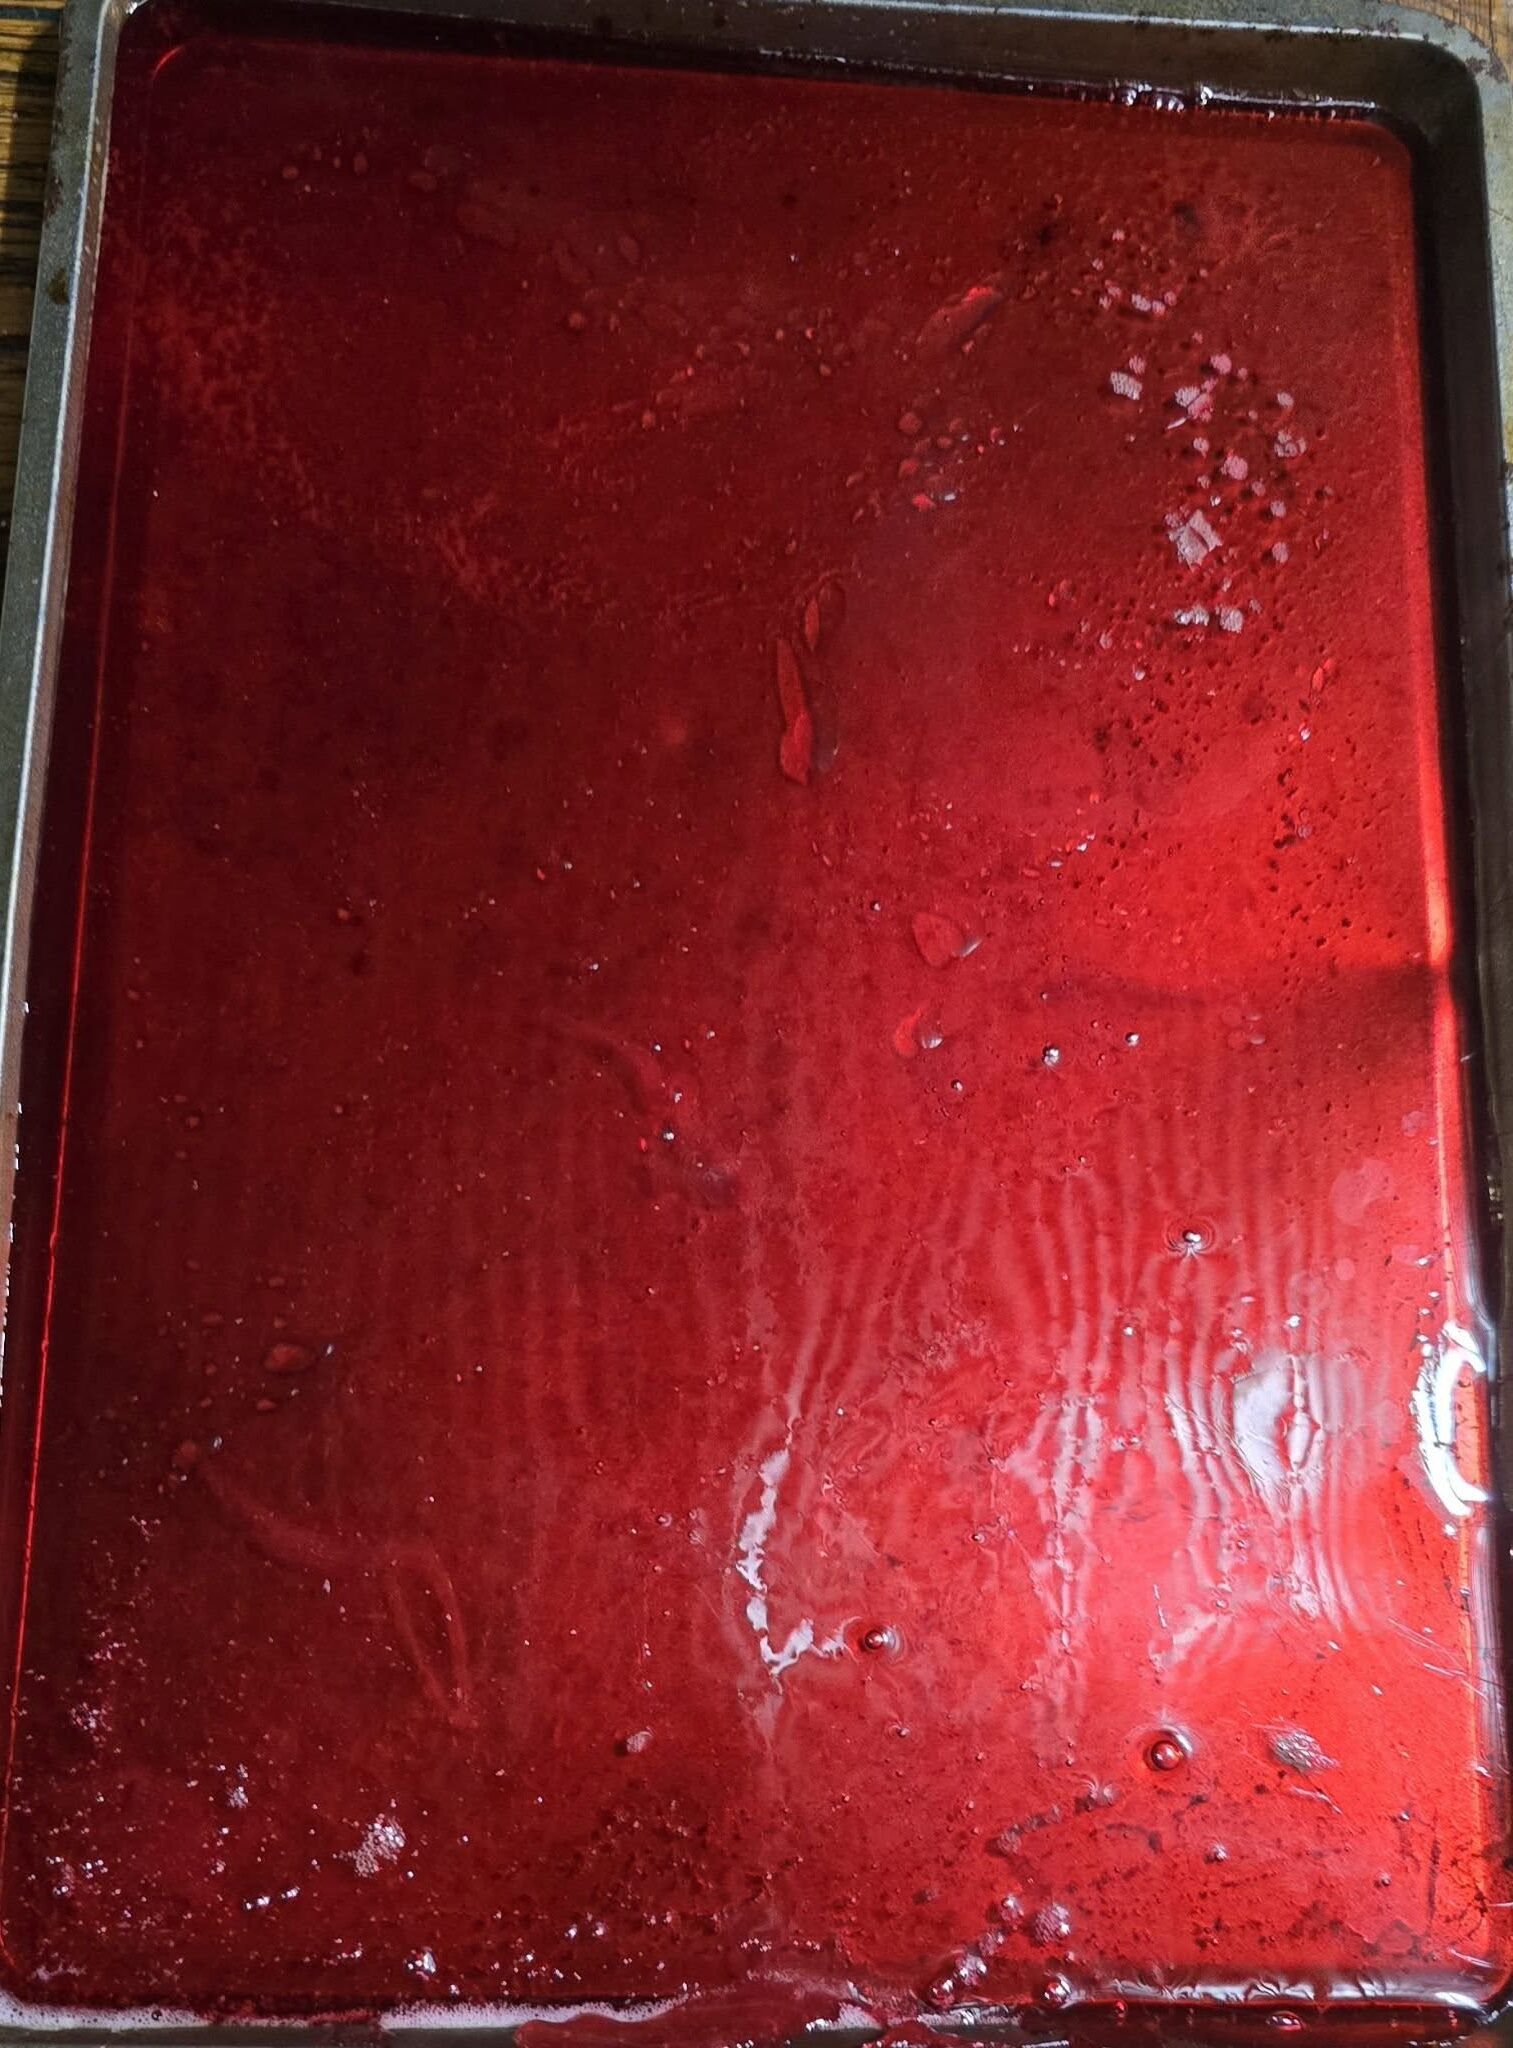
3 Once mixture reaches 300°F remove pan from heat and stir in the cinnamon oil, working quickly. Keep your face away from the mixture as it is strong like onions and keep the work area well ventilated. Pour immediately into prepared pan. Allow to cool for 4 hours.
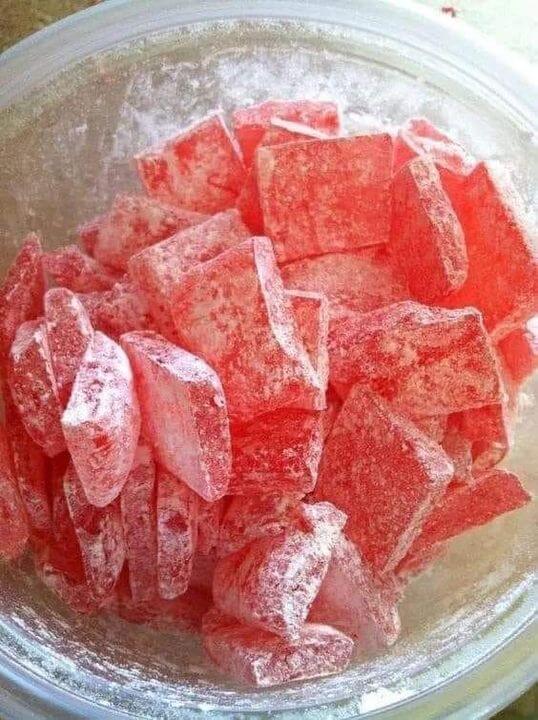
4 after 4 hours dust the top of the candy with powdered sugar. Flip candy over onto a large cutting board or cookie sheet and remove parchment paper. Return candy to the pan and use the tip of a sharp knife to break candy into bite size pieces. Dust with more powdered sugar and store in a airtight container.
Tips, Tricks & Helpful Notes
• Use a candy thermometer—this recipe depends on hitting 300°F. Too low and you’ll have chewy candy, too high and it may burn.
• Cinnamon oil is strong. Work with good ventilation and avoid leaning over the pan unless you want your sinuses cleared instantly.
• If you prefer a deeper color, add an extra drop or two of food coloring. Want a theme? Green for St. Patrick’s Day, pink for Valentine’s, even clear for snow-like crystals.
• For extra sparkle, lightly dust powdered sugar more than once or mix in a little edible glitter for party presentations.
• Want variety? Swap cinnamon for peppermint oil, cherry oil, or even mix batches for a colorful candy assortment.
When & How to Serve
Cinnamon Rock Candy shines brightest during holidays, winter gatherings, and gift-giving season, but there’s no rule that says you can’t enjoy it any time of year. Fill treat bags for party favors, use as a stocking stuffer, or place in a candy dish for guests. It also makes a gorgeous topping for cupcakes, hot cocoa, or even cheesecake.
Serve it:
• In cute mason jars tied with ribbon
• As part of a cookie platter
• Crushed and sprinkled on ice cream
• At school or office parties
• Wrapped as small thank-you gifts
Storage & Shelf Life
Once cooled and dusted, store the candy in an airtight container to preserve freshness. It keeps well at room temperature for several weeks, making it ideal to prepare ahead for events. Ensure pieces are completely cooled and dry before sealing to prevent sticking. If you live somewhere humid, a little extra powdered sugar helps keep pieces separated.
Freezing is unnecessary and not recommended since sugar candies can absorb moisture and lose their crackle. Room temp in a cozy container works perfectly.
FAQ
Q: Can I use cinnamon extract instead of cinnamon oil?
A: No. Extract isn’t strong enough; the flavor won’t come through properly. Cinnamon oil is essential.
Q: My candy didn’t crack. What went wrong?
A: It likely didn’t reach 300°F. The hard crack stage is crucial for the signature snap.
Q: Can I make other flavors with this recipe?
A: Yes! Peppermint, cherry, clove, or orange oil make great variations. Just swap the flavoring and adjust food coloring if desired.
Q: The smell is intense—is that normal?
A: Very. Cinnamon oil is powerful. Keep your face back and kitchen ventilated. It’s part of the experience!