Homemade Payday Candy Bars – Easy No-Bake Peanut Dessert
Homemade Payday Candy Bars – Easy No-Bake Peanut Dessert
There is something wildly comforting about homemade candy bars. Maybe it’s the nostalgia of unwrapping a sweet treat after school, or maybe it’s the quiet satisfaction of knowing you made something that looks like it came straight from a candy aisle… except better. These Homemade Payday Candy Bars bring that exact kind of joy. Sweet, salty, chewy, and packed with peanuts, they taste like childhood memories wrapped in a modern kitchen.
I still remember the first time I tried making a no-bake dessert like this. I was skeptical. Candy bars felt like something that required special equipment, thermometers, and nerves of steel. Turns out, all it really takes is a saucepan, a little patience, and a serious love for peanut butter. The combination of creamy peanut butter chips, soft marshmallows, and crunchy salted peanuts creates that irresistible balance of textures we all crave. It’s the kind of dessert you cut into “small” squares… and then go back for another piece five minutes later.
What makes this recipe even more special is how simple it is. No oven. No complicated steps. Just melt, mix, layer, chill, and slice. It’s perfect for family gatherings, weekend treats, bake sales, or those evenings when you want something sweet but don’t want to spend hours in the kitchen.
Homemade Payday Candy Bars
Easy to prepare homemade super delicious dessert.
Ingredients
Homemade payday candy bar requires just a few ingredients
1.3 cups salted peanuts
2.2 cups peanut butter chips
3.2 cups mini marshmallows
4.1 can sweetened condensed milk
5.3 tablespoons unsalted butter
6.½ teaspoon vanilla extract
Directions
Step 1: Place butter and peanut butter chips in a large saucepan and melt them over medium heat until you achieve a smooth consistency.
Step 2: Add condensed milk, vanilla extract and marshmallows to the melted butter-peanut butter mix. Stir until the mix is smooth and fully incorporated.
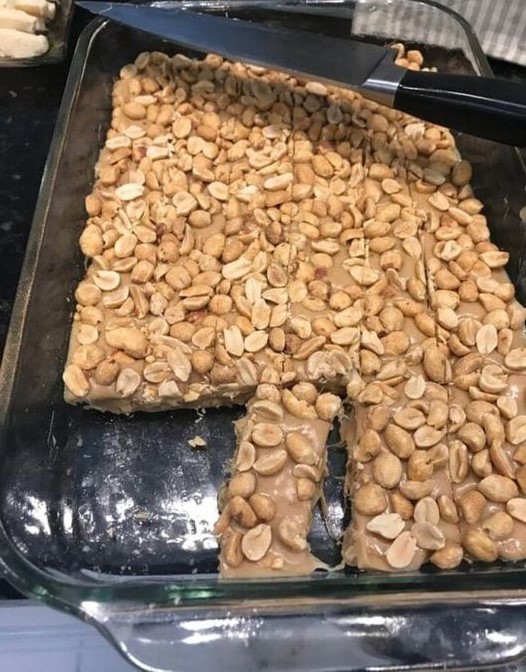
Step 3: Grease a 9×13-inch rectangular baking dish with butter or non-stick spray. Spread half of the peanuts across the baking dish
Step 4: Pour the mix from step 2evenly over the peanuts, and then sprinkle the remaining peanuts on top
Step 5: Refrigerate or let sit at room temperature until it sets. Cut candy into serving bars and enjoy.
Cooking Tips & Smart Substitutions
Even though this recipe is wonderfully simple, a few small tips can make a big difference:
-
Low and slow melting: When melting the butter and peanut butter chips, keep the heat at medium or slightly lower. Peanut butter chips can scorch if overheated, and nobody wants that slightly bitter taste sneaking in.
-
Stir constantly: Once everything is in the saucepan, keep stirring so the marshmallows melt evenly and don’t clump.
-
Swap the peanuts: If salted peanuts aren’t your thing, you can use dry roasted peanuts or even honey roasted for a sweeter twist.
-
Nut-free option: Substitute peanuts with crispy rice cereal for a similar crunch without nuts.
-
Extra indulgence: A light drizzle of melted chocolate on top after the bars have set adds a bakery-style finish.
Serving Ideas: When to Enjoy These Bars
These Homemade Payday Candy Bars are incredibly versatile.
-
Holiday dessert trays: Their golden peanut topping makes them look festive and inviting.
-
Game night snacks: Slice them into smaller bite-sized squares for easy grabbing.
-
Lunchbox treats: Wrap individual bars in parchment paper for a homemade surprise.
-
Potlucks and gatherings: They travel well and hold their shape, making them perfect for sharing.
They pair beautifully with a cold glass of milk, a hot cup of coffee, or even an afternoon tea break when you need something sweet and satisfying.
Storage & Freezing Tips
One of the best things about these bars is how well they store.
-
Room temperature: Keep them in an airtight container for up to 3 days.
-
Refrigerator: Store for up to 1 week for best freshness. They stay firm and slice cleanly when chilled.
-
Freezer: Yes, you can freeze them. Wrap bars individually in plastic wrap and place in a freezer-safe container. They’ll keep for up to 2 months. Thaw in the refrigerator before serving.
If your kitchen runs warm, refrigeration is your best friend to keep the bars from becoming too soft.
Frequently Asked Questions
1. Can I use regular marshmallows instead of mini marshmallows?
Yes, but chop them into smaller pieces so they melt more evenly and quickly.
2. Why didn’t my bars set properly?
They may need more chilling time. Warmer climates can slow the setting process, so refrigeration is recommended.
3. Can I make these ahead of time?
Absolutely. These bars are perfect for making a day or two in advance since they store so well.
4. Can I reduce the sweetness?
You can slightly balance the sweetness by using unsalted peanuts and adding a small pinch of salt to the mixture.