Salted Caramel Peanut Butter Ritz Cookies – The Sweet & Salty Holiday Favorite
Salted Caramel Peanut Butter Ritz Cookies – The Sweet & Salty Holiday Favorite
Introduction
Some recipes don’t come from cookbooks or fancy culinary experiments—they come from real kitchens, passed along between friends, scribbled on scraps of paper, or shared after someone takes one bite and immediately asks, “Okay, I need this recipe.” These Salted Caramel Peanut Butter Ritz Cookies are exactly that kind of treat.
They’re the kind of dessert that shows up during the holidays and quietly steals the spotlight. Not because they’re complicated or overly decorative, but because they hit that perfect balance of flavors—sweet, salty, creamy, and crunchy—all in one bite. And honestly, that’s what makes them unforgettable.
What’s even better is how incredibly easy they are to make. No baking from scratch, no complicated techniques—just simple layering, melting, and assembling. It’s the kind of recipe you can make in an evening without turning your kitchen upside down, yet still end up with something that looks and tastes like you spent hours on it.
These cookies also carry that nostalgic charm. Ritz crackers, peanut butter, caramel—these are pantry staples that somehow transform into something special when combined. It’s comfort food at its finest, dressed up just enough to feel festive.
Whether you’re making them for a holiday tray, gifting them to friends, or just treating yourself after a long day, these cookies always deliver. And once you make them, don’t be surprised if people start expecting them every year.
Salted Caramel Peanut Butter Cookies
Ingredients
24 Ritz crackers
Creamy Peanut Butter
Smucker’s Caramel Ice Cream topping
1 tray white candy coating (Food Lion Candiquik)
Coarse sea salt
Directions
Cover 24 Ritz crackers with your favorite Creamy Peanut Butter.
Next drop a dime-sized dollop of Smucker’s Caramel Ice Cream topping on top of the peanut butter.
Top with another Ritz cracker.
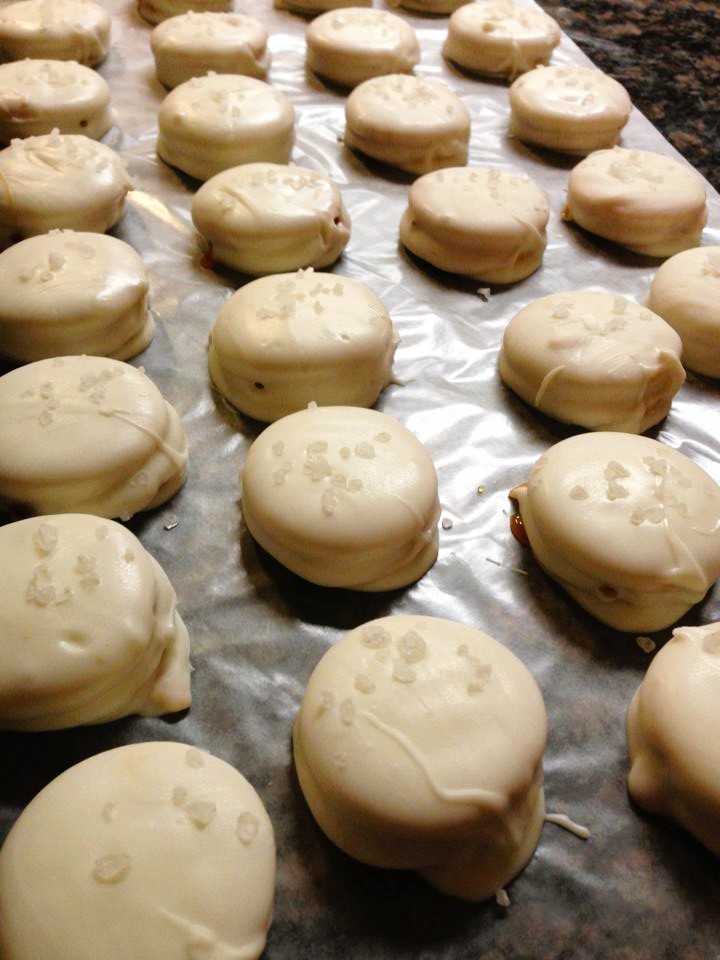
When all cookies are ready, melt one tray of white candy coating ( I use Food Lion Candiquik) according to package directions.
Coat each cookie in the melted white chocolate and immediately place on a wax paper sheet to cool.
A teaspoon works great for working with the cookie sandwiches and the candy coating.
When completed, sprinkle each cookie lightly with coarse sea salt.
Store in an air-tight container in the refrigerator.
Cooking Tips and Substitutions
Even though this recipe is almost foolproof, a few small tips can make your cookies look and taste even better. First, when spreading the peanut butter, try to keep it even—not too thick, not too thin. If you go overboard, the sandwich can slide apart when dipping into the coating.
When it comes to the caramel, less is more. A small dollop is enough to give that rich flavor without making the cookies messy or overly soft.
If you can’t find the exact candy coating mentioned, don’t panic. Any good-quality white melting chocolate or almond bark will work just fine. Just make sure to melt it slowly to avoid clumping or burning.
Want to change things up a bit? You can swap creamy peanut butter for crunchy if you prefer extra texture. Or even try a chocolate drizzle on top after the coating sets—it adds a nice visual touch without much effort.
Serving Ideas and When to Enjoy
These cookies are basically made for the holidays, but there’s no reason to limit them to just that. They’re perfect for cookie exchanges, family gatherings, or even as a quick homemade gift.
Serve them chilled straight from the fridge for a firmer bite, or let them sit out for a few minutes if you prefer a softer texture. Pair them with coffee, hot chocolate, or even a glass of milk—they work with just about anything.
They also make a great addition to dessert platters. Their clean white coating and sprinkle of sea salt give them a polished look that stands out among traditional baked goods.
Storage and Freezing Tips
Because of the coating and filling, these cookies are best stored in the refrigerator. Keep them in an airtight container, and they’ll stay fresh for several days without losing texture or flavor.
If you need to store them longer, freezing is an option. Just layer them between sheets of wax paper in a freezer-safe container. When you’re ready to eat them, let them thaw in the fridge or at room temperature.
Avoid stacking them without separation, though—unless you enjoy peeling cookies apart and ruining the coating.
Frequently Asked Questions
1. Can I make these ahead of time?
Yes, and you probably should. They actually hold up really well, making them perfect for prepping a day or two in advance.
2. Why is my coating too thick?
That usually means it overheated or cooled too quickly. Melt it gently and work in batches if needed.
3. Can I use dark or milk chocolate instead of white?
Absolutely. It will completely change the flavor, but in a good way if you prefer a richer taste.
4. Do I have to refrigerate them?
Technically no, but it’s strongly recommended. The texture and freshness are much better when kept chilled.